
Trader Joe’s Brined Turkey offers a convenient‚ pre-brined option for a juicy‚ flavorful centerpiece with minimal effort‚ perfect for Thanksgiving or any special meal.
1.1 What Makes Trader Joe’s Brined Turkey Unique
Trader Joe’s Brined Turkey stands out for its pre-brined preparation‚ ensuring maximum flavor and juiciness without extra effort. The brine‚ made with natural ingredients like salt‚ sugar‚ and spices‚ enhances tenderness and taste. Its convenience is unmatched‚ as it eliminates the need for manual brining or seasoning. Perfect for those seeking a hassle-free yet delicious meal‚ this turkey is a crowd-pleaser. The brining process locks in moisture‚ resulting in a tender and savory final product that impresses every time. It’s a stress-free‚ high-quality option for any special occasion or holiday feast.
1.2 Why Choose a Pre-Brined Turkey for Your Meal
A pre-brined turkey simplifies meal preparation‚ saving time and effort. The brining process enhances moisture and flavor‚ ensuring a tender and juicy result. It eliminates the need for manual brining or seasoning‚ making it ideal for both novice and experienced cooks. The pre-brined option guarantees consistent taste and reduces the risk of overcooking. Perfect for busy households‚ it offers a stress-free way to deliver a delicious‚ memorable meal. With Trader Joe’s pre-brined turkey‚ you can focus on other aspects of your celebration while enjoying a flavorful‚ high-quality centerpiece.

Understanding the Brining Process
Brining involves soaking the turkey in a saltwater solution to tenderize meat and enhance flavor. Trader Joe’s pre-brined turkeys simplify this process for a juicy‚ flavorful result.
2.1 What Is Brining and How Does It Work
Brining is a culinary technique where meat is soaked in a saline solution to enhance flavor and moisture. The process involves dissolving salt and seasonings in water‚ then submerging the turkey to allow osmosis to lock in juices and flavors. This method ensures the turkey remains tender and juicy during cooking. Trader Joe’s pre-brined turkeys undergo this process‚ making them a convenient option for home cooks seeking a flavorful and moist centerpiece without the hassle of brining from scratch.
2.2 The Ingredients in Trader Joe’s Brine Recipe
Trader Joe’s brine recipe typically includes salt‚ sugar‚ black pepper‚ and a blend of aromatic spices like garlic‚ herbs‚ and sometimes butter for added richness. These ingredients dissolve in water to create a flavorful solution that enhances the turkey’s natural taste. The brine works by breaking down the proteins in the meat‚ ensuring it stays juicy and tender during cooking. The combination of sweet and savory elements in the brine balances the turkey’s flavor‚ making it a perfect choice for those seeking a moist and delicious meal without the effort of preparing a brine from scratch.
Preparing for Cooking
Preparing Trader Joe’s brined turkey involves proper thawing‚ gathering essential tools like a roasting pan‚ and ensuring everything is ready for a seamless cooking experience.
3.1 Thawing Instructions for Your Brined Turkey
Thawing your Trader Joe’s brined turkey is essential for even cooking. Place the turkey in its original packaging on the middle shelf of the refrigerator. Allow about 24 hours of thawing time for every 4-5 pounds. Ensure the turkey remains at a safe temperature below 40°F to prevent bacterial growth. Do not thaw at room temperature or in warm water‚ as this can compromise food safety. Once thawed‚ pat the turkey dry with paper towels before cooking to ensure crisp skin and even browning. Proper thawing ensures juiciness and flavor retention during roasting.
3.2 Essential Tools and Equipment Needed
Cooking a Trader Joe’s brined turkey requires specific tools for the best results. A large roasting pan with a rack is essential to elevate the turkey and promote air circulation. A meat thermometer ensures the turkey reaches a safe internal temperature of 165°F. Tongs or a basting tool helps distribute juices evenly. Preheat your oven to the recommended temperature‚ and have foil ready to tent the turkey if it browns too quickly. Optional tools include a brining bag for thawing and gloves for handling. These tools ensure a perfectly cooked‚ juicy turkey with minimal effort and maximum flavor.

Step-by-Step Cooking Instructions
Preheat your oven‚ place the turkey in a roasting pan‚ and roast at high heat for browning. Reduce heat‚ baste regularly‚ and cook until juicy perfection.
4.1 Preheating Your Oven
Preheating your oven is a crucial step to ensure even cooking. Set your oven to 400°F (200°C) for at least 30 minutes before placing the turkey inside. This high heat helps create a golden-brown crust. After preheating‚ carefully remove the rack or roasting pan to place the turkey. Once the turkey is in the oven‚ reduce the heat to 325°F (160°C) after the initial 30 minutes of roasting. This temperature adjustment ensures the turkey cooks thoroughly without drying out. Always use oven mitts to handle hot pans and racks for safety.
4.2 Placing the Turkey in the Roasting Pan
Position the turkey in a large roasting pan‚ preferably on a V rack to allow air circulation. Ensure the turkey is breast-side up for even cooking. Pat the skin dry with paper towels to enhance browning. Place the turkey in the preheated oven at 400°F (200°C) for the initial high heat phase. After 30 minutes‚ reduce the oven temperature to 325°F (160°C) and continue roasting. Tenting the turkey with foil during cooking can help prevent overbrowning. Always handle the hot pan with oven mitts for safety.
4.3 Initial High Heat Roasting
Begin by placing the turkey in a preheated oven at 400°F (200°C) for the first 30 minutes. This step enhances browning and crisps the skin. After 30 minutes‚ reduce the heat to 325°F (160°C) to prevent overcooking. Baste the turkey with pan juices every 30 minutes to maintain moisture and flavor. Use a meat thermometer to monitor internal temperatures‚ ensuring the breast reaches 165°F (74°C) and thighs 180°F (82°C). Tenting with foil can prevent excessive browning. This method ensures a golden‚ juicy turkey with minimal effort‚ perfect for a stress-free holiday meal.
4.4 Reducing Heat and Basting
After the initial high-heat roasting‚ reduce the oven temperature to 325°F (160°C) to ensure even cooking and prevent drying out. Every 30 minutes‚ baste the turkey with pan juices‚ melting fat‚ and additional butter or herbs if desired. This step enhances moisture‚ flavor‚ and browning. Use a baster or spoon to evenly distribute the juices over the breast and thighs. Tenting the turkey with foil can prevent overbrowning. Continue basting until the turkey reaches the safe internal temperature of 165°F (74°C) for the breast and 180°F (82°C) for the thighs. This method guarantees a juicy‚ flavorful result.
Cooking Methods and Techniques
Explore versatile cooking methods like oven roasting‚ grilling‚ or sous vide for Trader Joe’s brined turkey‚ each offering unique flavors and textures to elevate your meal.
5.1 Oven Roasting: The Most Common Method
Oven roasting is the most popular way to cook Trader Joe’s brined turkey‚ ensuring even cooking and a golden-brown finish. Preheat your oven to 400°F (200°C). Place the turkey in a roasting pan‚ breast side up‚ and roast for 30 minutes. Reduce the heat to 325°F (160°C) and continue cooking for 2-3 hours‚ depending on the turkey’s size. Baste the turkey with pan juices every 30 minutes to maintain moisture and flavor. Use a meat thermometer to check for an internal temperature of 165°F (75°C) in the thickest part of the breast and 180°F (82°C) in the thigh. Let the turkey rest for 20-30 minutes before carving for optimal juiciness.
5;2 Grilling: A Smoky Alternative
Grilling offers a smoky twist for cooking Trader Joe’s brined turkey. Preheat your grill to 375°F (190°C) and set up for indirect heat. Place the turkey‚ breast side up‚ on the cooler side of the grill. Close the lid and cook for about 2-3 hours‚ depending on the turkey’s size. Baste with pan juices every 20-30 minutes to keep it moist. Monitor the temperature to prevent flare-ups and ensure even cooking. The turkey is done when the internal temperature reaches 165°F (75°C) in the breast and 180°F (82°C) in the thigh. This method adds a rich‚ charred flavor perfect for outdoor enthusiasts.

5.3 Sous Vide: Precision Cooking for Juiciness
Sous vide cooking ensures a tender and juicy Trader Joe’s brined turkey. Preheat your sous vide water bath to 145°F (63°C). Place the turkey in a sealed bag‚ removing as much air as possible to prevent uneven cooking. Submerge the bag in the water bath and cook for 6-8 hours. This method maintains consistent moisture and flavor. Finish by searing the turkey in a hot skillet or blowtorch for a golden-brown crust. The result is a perfectly cooked‚ evenly seasoned turkey with unmatched juiciness‚ ideal for those seeking precision and ease in their cooking process.
Tips for Achieving a Perfect Turkey
Baste regularly‚ use a meat thermometer for doneness‚ and tent the turkey to prevent overbrowning‚ ensuring a juicy‚ evenly cooked‚ and visually appealing result every time.
6.1 The Importance of Basting
Basting is a crucial step in achieving a perfectly cooked turkey. It ensures the meat stays moist and evenly flavored while enhancing the golden-brown appearance. Regular basting‚ every 30 minutes‚ helps redistribute the juices and prevents dryness. Use pan juices or melted butter for added richness. This technique also promotes even browning and infuses the turkey with aromatic flavors from the brine. Proper basting ensures a tender‚ juicy texture and a visually appealing result‚ making it a key factor in delivering a delicious and memorable meal for your guests.
6.2 Using a Meat Thermometer for Doneness
Using a meat thermometer is essential to ensure your turkey is cooked to a safe internal temperature. The breast should reach 165°F‚ while the thigh should reach 180°F. Insert the thermometer into the thickest part of the breast and the innermost part of the thigh‚ avoiding bones or fat. Proper use guarantees doneness without overcooking‚ ensuring juicy and flavorful meat. This step is crucial for food safety and achieving the perfect texture. Always rely on a thermometer rather than cooking time alone for accurate results.
6.3 Tenting the Turkey to Prevent Overbrowning
Tenting the turkey with foil is a simple technique to prevent overbrowning while cooking. Cover the turkey loosely with aluminum foil‚ especially the breast area‚ during the initial roasting phase. This step ensures even browning and prevents the skin from becoming too dark. Remove the foil during the final 30 minutes of cooking to allow the skin to crisp up. Tenting also helps retain moisture and promotes even basting. For optimal results‚ tent the turkey after the first 30 minutes of roasting and remove it toward the end to achieve a golden-brown finish without sacrificing juiciness.
Common Mistakes to Avoid
- Overcooking can dry out the turkey‚ so use a meat thermometer to ensure the internal temperature reaches 165°F.
- Not letting the turkey rest after cooking can result in lost juices and a less tender texture.
7.1 Overcooking and Drying Out the Turkey
Overcooking is a common mistake that can dry out the turkey‚ making it tough and flavorless. Trader Joe’s brined turkey is pre-brined to stay juicy‚ but excessive heat or prolonged cooking can undo this. Always use a meat thermometer to ensure the internal temperature reaches 165°F. Overcooking beyond this temperature will strip the turkey of its moisture. To prevent drying‚ avoid leaving the turkey in the oven longer than recommended. Baste regularly and monitor the turkey’s progress to ensure it remains tender and juicy. Proper timing and attention are key to achieving a perfectly cooked‚ moist turkey.
7.2 Not Allowing the Turkey to Rest
Not allowing the turkey to rest is a critical mistake that can lead to a dry‚ less flavorful meal. After roasting‚ the juices need time to redistribute within the meat. If you slice the turkey immediately‚ the juices will escape‚ leaving the meat dry and tough. Letting the turkey rest for 20-30 minutes under a tent of foil ensures even distribution of juices‚ resulting in a tender and juicy texture. This step is essential‚ even for a pre-brined turkey‚ as it preserves the moisture and flavor achieved during cooking. Resting is a simple yet crucial step for a perfect turkey.
Serving Suggestions
Trader Joe’s Brined Turkey pairs perfectly with classic Thanksgiving sides like mashed potatoes‚ stuffing‚ and cranberry sauce. For leftovers‚ try creative uses in sandwiches‚ soups‚ or salads.
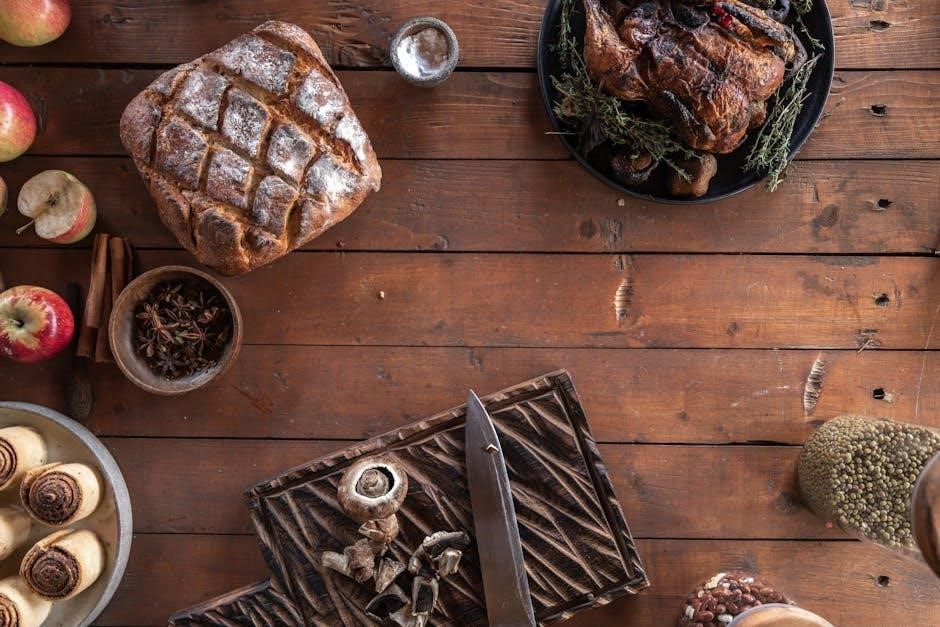
8.1 Pairing with Classic Thanksgiving Sides
Trader Joe’s Brined Turkey shines when paired with classic Thanksgiving sides. Mashed potatoes absorb the savory juices‚ while stuffing and cranberry sauce add complementary flavors. Roasted vegetables like Brussels sprouts or carrots provide a crisp contrast to the tender turkey. The brine enhances the bird’s natural taste‚ making it a perfect match for traditional dishes. This combination creates a balanced and flavorful meal that satisfies both classic and contemporary palates. The convenience of the pre-brined turkey ensures a stress-free pairing with your favorite holiday sides.
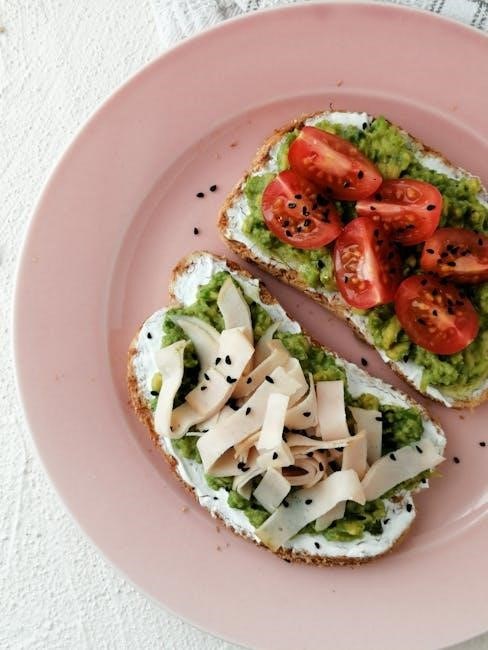
8.2 Creative Ways to Use Leftover Turkey
Transform leftover Trader Joe’s Brined Turkey into delicious new dishes. Shred it for hearty soups‚ salads‚ or wraps. Make turkey pot pies‚ casseroles‚ or stuffed baked potatoes. Use it in sandwiches‚ quesadillas‚ or as a topping for nachos. For a twist‚ add it to pasta sauces‚ stir-fries‚ or breakfast skillets. Freeze it for future meals like turkey tetrazzini or enchiladas. The brined flavor pairs well with creamy sauces and spices‚ offering endless possibilities for creative meals. Leftover turkey can elevate everyday dishes into satisfying‚ flavorful experiences for days after your feast.
Cooking Trader Joe’s Brined Turkey is a stress-free way to achieve a flavorful‚ moist centerpiece. With minimal effort‚ you can impress your guests and enjoy a memorable meal.
9.1 Final Thoughts on Cooking Trader Joe’s Brined Turkey
Cooking Trader Joe’s Brined Turkey is a delightful experience that ensures a flavorful‚ juicy‚ and tender result with minimal effort. The pre-brined turkey simplifies preparation‚ making it ideal for both novice and experienced cooks. Whether you’re hosting a small gathering or a large feast‚ this turkey delivers a mouthwatering centerpiece. The brining process enhances the natural flavors‚ while the straightforward cooking instructions guarantee a stress-free experience. By following the guidelines and using a meat thermometer‚ you’ll achieve a perfectly cooked turkey. With its convenience and exceptional taste‚ Trader Joe’s Brined Turkey is a reliable choice for any special meal.
9.2 Encouragement to Experiment and Enjoy
Don’t hesitate to get creative with Trader Joe’s Brined Turkey! Whether you prefer oven roasting‚ grilling‚ or sous vide‚ this turkey adapts beautifully to various cooking methods. Experiment with basting techniques using pan juices or herbs for added flavor. For a unique twist‚ try seasoning with garlic butter or spices before roasting. Remember‚ the key to a memorable meal is to enjoy the process and share it with loved ones. Don’t be afraid to try new recipes or leftovers ideas—your creativity will shine through. Let Trader Joe’s Brined Turkey be the star of your feast while you savor the joy of cooking and connection.