
Welcome to the comprehensive guide for assembling the Ashley Baystorm bed. This document provides clear, step-by-step instructions to ensure a smooth and successful assembly process.
Designed for modern bedrooms, the Baystorm bed combines style and functionality. Follow these instructions carefully to achieve a professional-looking result. Assembly requires two people for safety.
Before starting, gather all tools and hardware. This guide includes essential tips and troubleshooting advice to help you complete the task efficiently. Happy assembling!
Estimated assembly time: 25 minutes. Ensure all parts are ready and follow safety precautions to avoid injuries or damage. Enjoy your new Ashley Baystorm bed!
Overview of the Ashley Baystorm Bed
The Ashley Baystorm bed is a stylish and functional furniture piece designed for modern bedrooms. It features a sleek design with clean lines, blending seamlessly into contemporary decor. The bed is constructed from high-quality materials, ensuring durability and long-lasting performance. One of its standout features is the inclusion of two underbed storage drawers, providing ample space for organizing linens, out-of-season clothing, or personal items. This bed is part of the Signature Design by Ashley collection, known for its dedication to craftsmanship and innovative design. Its compact footprint makes it suitable for various room sizes, while its aesthetic appeal enhances any bedroom setting. Perfect for those seeking a practical yet elegant sleeping solution.
Importance of Following Assembly Instructions
Following the assembly instructions for the Ashley Baystorm bed is crucial for ensuring safety, proper assembly, and preventing potential damage. Misaligned parts or incorrect hardware usage can lead to instability or structural issues, compromising the bed’s durability. Adhering to the guidelines minimizes the risk of injuries and ensures all components fit securely. Additionally, proper assembly guarantees optimal performance and longevity of the bed. Always read the manual carefully and double-check each step to avoid mistakes. Taking shortcuts or ignoring safety precautions can result in a poorly assembled bed, which may not function as intended. By following the instructions diligently, you can achieve a professional-quality assembly and enjoy your new bed with confidence.
Tools and Materials Needed for Assembly
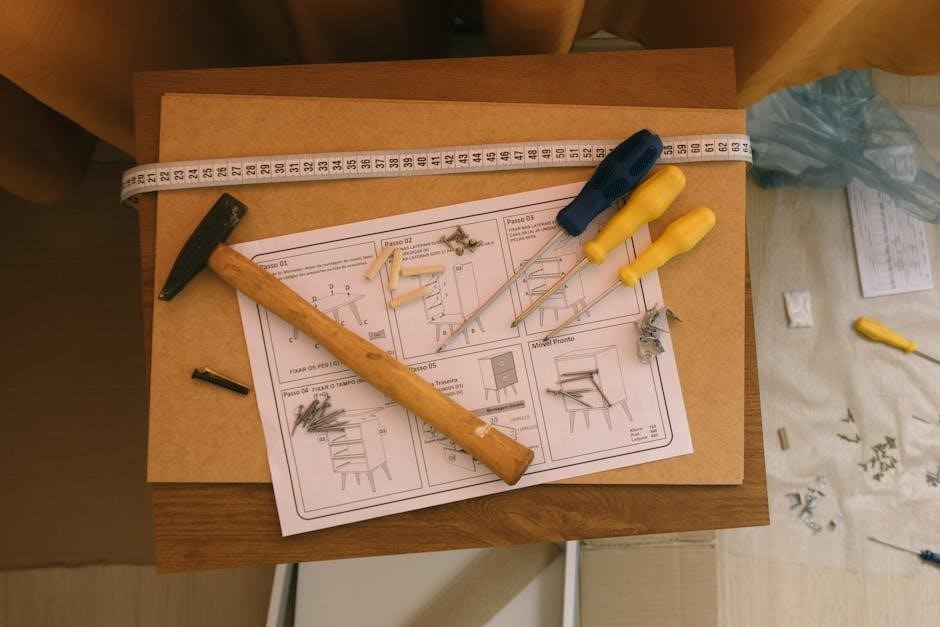
Essential tools include an Allen wrench, screwdriver, and measuring tape. Ensure all hardware is organized to avoid losing parts during assembly.
A rubber mallet may be helpful for aligning components. Gather all materials before starting to streamline the process.
Essential Tools Required
To successfully assemble the Ashley Baystorm bed, gather the following essential tools: a screwdriver (both Phillips and flathead), an Allen wrench, a rubber mallet, measuring tape, and clamps.
These tools will help you tighten bolts, align parts, and secure components safely. Ensure all tools are easily accessible to streamline the assembly process. Additional tools like a drill may be useful but are not always necessary. Always refer to the provided hardware list to confirm requirements. Proper tools ensure a stable and secure assembly, avoiding potential damage or misalignment. Organize your tools and hardware beforehand to save time and reduce frustration during assembly.
Hardware and Parts Included in the Package
The Ashley Baystorm bed assembly package includes all necessary hardware and parts for a successful setup. These components are carefully organized to ensure a streamlined assembly process. The package contains bolts, screws, Allen wrenches, slats, support legs, headboard brackets, side rails, cam locks, and drawer glides. Additionally, smaller parts like washers, nuts, and wood dowels are provided. It is essential to verify the completeness of all items before starting assembly. Refer to the included manual for a detailed list and diagrams to identify each part accurately. Proper organization of these components will help avoid delays and ensure a smooth assembly experience.

Safety Precautions and Guidelines
Always follow safety guidelines to avoid injuries. Wear protective gloves and eyewear. Ensure the area is clear of obstacles. Small parts may pose a choking hazard for children. Never lift heavy components alone.
Keep children and pets away during assembly. Use a sturdy work surface and avoid over-tightening hardware. If unsure, consult the manual or seek assistance. Safety first!
General Safety Tips for Furniture Assembly
Always read the assembly instructions thoroughly before starting. Ensure the assembly area is clear, flat, and well-lit. Wear protective gloves and safety glasses to prevent injuries. Keep children and pets away from the workspace. Avoid using power tools near flammable materials. Follow each step carefully and never skip ahead. If unsure about a step, stop and seek clarification. Use only the tools and hardware provided or specified in the instructions. Never overtighten screws, as this can damage the bed frame. If a part feels unstable, double-check its alignment before proceeding. Assembly may require two people for safety, especially when handling heavy components. Always follow these guidelines to ensure a safe and successful assembly process.
Specific Safety Warnings for the Baystorm Bed
When assembling the Ashley Baystorm bed, ensure all safety precautions are followed to avoid injuries or damage. This bed requires two or more people for assembly, as attempting it alone poses a significant risk of injury. Small parts included in the hardware may present a choking hazard for young children, so keep them out of reach. Avoid using power tools near children or in hazardous environments. Always assemble the bed on a flat, stable surface to prevent tip-over accidents. Ensure all bolts and screws are tightened properly to maintain stability and prevent collapse. Follow the provided instructions carefully to ensure a safe and successful assembly process.

Step-by-Step Assembly Instructions
Begin by unpacking and organizing all components. Assemble the bed frame and support system, ensuring all parts are aligned correctly. Attach the headboard and footboard securely.
Next, install the slats and support legs for stability. Add the side rails and center support, tightening all bolts firmly. Finally, secure the drawers and storage compartment.
Double-check all connections and ensure the bed is level. Follow each step carefully for a safe and successful assembly. Estimated assembly time: 25 minutes.
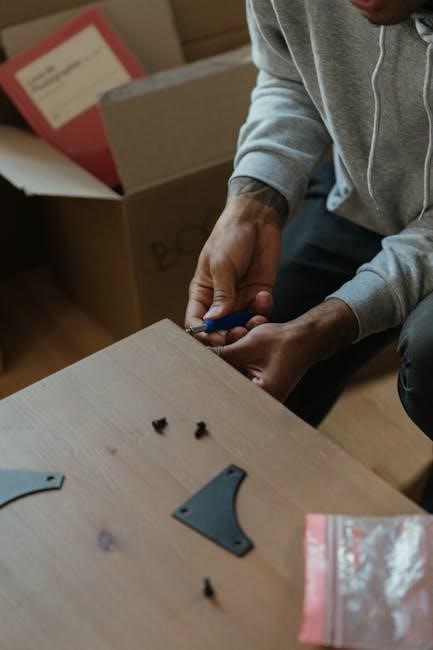
Unpacking and Organizing the Components
Begin by carefully unpacking all components from the boxes. Check for any damage or missing parts. Lay out the hardware and furniture pieces on a clean, flat surface.
Organize the parts according to the hardware list provided in the manual. Separate screws, bolts, and other fasteners into labeled containers for easy access. Identify the bed frame, headboard, footboard, slats, and support legs.
Use the assembly manual’s diagrams to match each part with its corresponding label. This step ensures a smooth assembly process and prevents confusion later. Double-check that all items are accounted for before proceeding.
Taking the time to organize now will save effort and reduce the risk of missing or misplaced components. Once everything is sorted, you’re ready to start assembling the bed frame.
Assembling the Bed Frame and Support System
Begin by laying out the bed frame components on a flat surface. Identify the side rails, center support, and frame connectors from the hardware list.
Attach the side rails to the frame using the provided bolts. Tighten securely but avoid overtightening. Next, align the center support with the pre-drilled holes and screw it into place.
Ensure the frame is level and stable before proceeding. Double-check all connections for proper alignment. If needed, adjust the frame slightly for even weight distribution.
Use a wrench to tighten all bolts firmly. Repeat this process for the support system to ensure maximum stability. Refer to the hardware list for correct screw sizes.
Once the frame and support system are fully assembled, proceed to attach the headboard and footboard. Ensure all parts are securely fastened for safety.
Verification of stability is crucial before adding additional components. Follow the instructions carefully to avoid misalignment or structural issues.
Attaching the Headboard and Footboard
Position the headboard against the bed frame, aligning the pre-drilled holes with the side rails. Use the provided bolts to secure it firmly.
Tighten the bolts in a star pattern to ensure even pressure. Repeat the process for the footboard, making sure it is level and aligned properly.
Double-check that all connections are secure to prevent any movement. If the headboard or footboard feels loose, adjust the bolts accordingly.
Ensure all hardware is correctly tightened to avoid wobbling. Once attached, test the stability by gently rocking the headboard and footboard.
Refer to the assembly manual for specific bolt sizes and torque requirements. Proper attachment is crucial for both safety and aesthetic appeal.
After securing, move on to installing the slats and support legs for added stability. Ensure all components are properly aligned and tightened.
Installing the Slats and Support Legs
Begin by laying the slats evenly across the bed frame, ensuring they fit snugly into the pre-designed slots. Align each slat with the frame’s supports for proper distribution of weight.
Secure the slats using the provided screws, tightening them firmly to avoid any movement. Repeat this process for all slats, working from the center outward.
Next, attach the support legs to the bed frame. Align the legs with the designated mounting points and fasten them using the bolts provided in the hardware kit.
Tighten all connections thoroughly to ensure stability. Double-check that the slats and support legs are evenly spaced and securely fastened.
Once installed, gently rock the bed to ensure there is no wobbling or instability. Proceed to attach the side rails and center support for added durability.
Refer to the assembly manual for specific torque requirements and slat placement guidelines to ensure optimal support and safety.
Adding the Side Rails and Center Support
Attach the side rails to the bed frame by aligning their pre-drilled holes with the corresponding bolts on the frame. Tighten the bolts securely using a wrench or screwdriver.
Next, position the center support beam in the middle of the bed frame, ensuring it aligns with the designated mounting points. Use the provided screws to fasten it firmly.
Tighten all bolts and screws to ensure the side rails and center support are stable and evenly spaced. This step is crucial for maintaining the bed’s structural integrity.
Double-check the alignment of the side rails and center support to ensure proper weight distribution. Refer to the manual for specific torque requirements.
Once installed, gently test the bed’s stability by applying pressure to ensure there is no movement or wobbling.
Proceed to the final tightening and quality check to ensure all components are securely fastened and properly aligned.
Securing the Drawers and Storage Compartment
Attach the drawers to the bed frame by aligning their slides with the pre-installed brackets. Gently push the drawers into place until they click securely.
Ensure the storage compartment is properly aligned with the frame. Use the provided screws to fasten it, tightening firmly to prevent any movement.
Double-check that all drawers and compartments are evenly spaced and securely attached. Avoid overloading the drawers beyond their weight capacity.
Test the drawers by opening and closing them to ensure smooth operation. Make sure the storage compartment closes tightly and remains stable.
Refer to the manual for specific torque settings and alignment guidelines. This step ensures the drawers and storage compartment function optimally.
Final Tightening and Quality Check
Once all components are assembled, perform a final tightening of all bolts and screws to ensure stability and safety. Double-check that all slats, side rails, and support legs are securely fastened. Verify that the headboard and footboard are properly aligned and attached. Inspect the drawers and storage compartment for smooth operation. Refer to the manual for torque specifications to avoid over-tightening. Finally, test the bed by applying moderate weight to ensure it is stable and even. Address any wobbling or misalignment issues immediately. Use a level to confirm the bed is evenly positioned. This step ensures your Baystorm bed is safe, durable, and ready for use.

Tips for a Smooth Assembly Process
Organize all parts before starting. Work in a clear, well-lit space. Follow each step carefully to avoid mistakes; Minimize distractions for a quicker assembly.
Reading the Instructions Carefully
Reading the assembly instructions thoroughly is crucial for a successful setup of your Ashley Baystorm bed. Start by reviewing the entire manual to understand the process and required tools. Pay close attention to safety notices and warnings to avoid potential hazards. Familiarize yourself with the hardware and parts list to ensure all components are accounted for. Cross-reference each step with the provided diagrams to avoid confusion. Assembly instructions emphasize the importance of following each step in order and using the correct hardware to maintain stability and safety. Take your time to read carefully, as this will prevent errors and ensure a smooth assembly experience.
Using the Provided Hardware Correctly
Using the provided hardware correctly is essential for a secure and stable assembly of the Ashley Baystorm bed. Always refer to the parts list in the manual to ensure you are using the right bolts, screws, and washers for each step. Avoid substituting hardware, as this can compromise the bed’s structural integrity. Tighten all connections firmly but avoid over-tightening, which may damage the wood or strip screws. If unsure about the correct hardware for a specific part, consult the assembly diagram or contact customer support. Proper hardware usage guarantees safety and ensures your bed lasts for years to come.
Troubleshooting Common Issues
Missing parts? Refer to the provided hardware list or contact customer support. Damaged components can be replaced by ordering from the manufacturer.
Alignment issues? Double-check connections and ensure all bolts are securely tightened. If instability persists, verify the frame’s level and adjust as needed.
Consult the manual or online resources for additional guidance. Addressing problems early ensures a sturdy and safe assembly of your Baystorm bed.
Identifying and Resolving Missing or Damaged Parts
If you notice any missing or damaged parts during assembly, refer to the hardware and parts list in the manual for identification. Check all packaging thoroughly to ensure no items were overlooked. If a part is still missing, contact Ashley Furniture customer service using the information provided in the manual. Provide your model and serial number for efficient assistance. Damaged parts should be reported immediately to avoid delays. For replacements, follow the instructions on the manufacturer’s website or contact their support team. Always have your order details ready for quick resolution. This ensures your Baystorm bed assembly proceeds smoothly without unnecessary setbacks.
Fixing Alignment or Stability Problems
If the bed frame feels unstable or misaligned during assembly, check all bolts and screws for proper tightening. Ensure slats are evenly spaced and securely attached to the side rails.
Verify that the bed is placed on a level surface. If instability persists, inspect the legs for damage or uneven adjustment. Tightening the center support bolts can also improve stability.
For alignment issues, double-check the hardware placement against the manual. Ensure no parts are missing or incorrectly installed. If problems remain, consult the troubleshooting section or contact customer support.
Re-tightening all connections and ensuring proper hardware usage will help resolve most alignment or stability concerns. Follow the manufacturer’s guidelines for optimal results.
Additional Resources and Support
For further assistance, download the latest Ashley Baystorm Bed Assembly Instructions PDF from the official website or contact Ashley Furniture Customer Service for support.
Visit the Ashley Furniture website for replacement parts, troubleshooting guides, or to access the most updated assembly manual. Their customer service team is available to address any concerns.
Downloading the Latest Assembly Manual
To ensure a smooth assembly process, download the latest version of the Ashley Baystorm bed assembly instructions from the official website or authorized sources. The manual is available as a PDF, making it easy to access and print. With a 4.5/5 rating and over 12,000 downloads, this guide is trusted by many. The document includes detailed step-by-step instructions, hardware lists, and safety guidelines. Visit the provided link to download the manual directly. Ensure you review the safety notices and assembly time estimate of 25 minutes before starting. This manual is essential for a successful and stress-free assembly experience.
Contacting Ashley Furniture Customer Service
For assistance with your Ashley Baystorm bed assembly, contact Ashley Furniture customer service. They provide support for missing or damaged parts and assembly difficulties. Visit their official website or refer to the manual for contact details.
When reaching out, have your model and serial number ready, found on the manual’s front page. The customer service team is available to address concerns and ensure a smooth assembly process. Additionally, download the latest assembly manual from their website for updated instructions.
Ashley Furniture disclaims liability for damages due to improper assembly, making it crucial to follow guidelines or seek help when needed. Ensure a successful setup by utilizing their support resources.
Successfully assembling your Ashley Baystorm bed brings a sense of accomplishment and enhances your bedroom’s style. Ensure all parts are securely tightened for stability and longevity.
Regular maintenance and proper care will keep your bed looking great. Enjoy the comfort and durability of your new Ashley Baystorm bed for years to come!
Final Thoughts on the Assembly Process
Completing the Ashley Baystorm bed assembly is a rewarding experience that transforms your bedroom with modern style and functionality. With an estimated assembly time of 25 minutes, it’s a manageable project for most. Always ensure two people are involved for safety and efficiency. Carefully following the instructions and preparing all parts beforehand ensures a smooth process. Double-checking each step helps prevent errors and ensures stability. Once assembled, the bed offers a sturdy and elegant addition to your home. For any issues, refer to the troubleshooting section or contact Ashley Furniture support. Enjoy your new Baystorm bed and the satisfaction of a job well done!
Maintaining and Caring for Your Baystorm Bed
To keep your Ashley Baystorm bed in excellent condition, regular maintenance is essential. Dust the frame and drawers weekly using a soft cloth to prevent dust buildup. For cleaning, use a damp cloth with mild detergent, avoiding harsh chemicals that may damage the finish. Inspect the bed periodically for loose screws or bolts and tighten them as needed. Ensure the drawers are properly aligned and not overloaded, as this can cause structural strain. Place felt pads under the legs to protect flooring from scratches. By following these care tips, your Baystorm bed will remain sturdy, functional, and visually appealing for years to come.
Frequently Asked Questions (FAQs)
Common questions include assembly time, difficulty level, and required tools. Addressing concerns, the process typically takes 25 minutes with two people. Replacement parts can be ordered through customer service.
For missing or damaged items, refer to the manual for model details. Safety notices emphasize avoiding solo assembly and ensuring all parts are securely tightened. Downloads for the latest instructions are available online.
Common Questions About the Assembly Process
Q: What is the estimated time to assemble the Ashley Baystorm bed?
A: The assembly typically takes around 25 minutes, depending on your familiarity with DIY projects.
Q: Do I need help from another person?
A: Yes, some steps require two people to ensure safety and stability during assembly.
Q: What if I find missing or damaged parts?
A: Contact Ashley Furniture customer service using the information in the manual for replacement parts.
Q: Are there specific safety precautions I should follow?
A: Yes, small parts may pose a choking hazard for children, and proper assembly techniques are crucial to avoid injury.
Q: What if I encounter alignment issues?
A: Double-check the instructions and ensure all hardware is correctly used; tighten all bolts firmly after assembly;
Addressing these common questions will help ensure a smooth and successful assembly process for your Baystorm bed.
Addressing Concerns About Time and Difficulty
Many users worry about the time and difficulty involved in assembling the Ashley Baystorm bed. Rest assured, the process is designed to be manageable for most people. The estimated assembly time is approximately 25 minutes, making it a relatively quick task. While some steps may seem complex, following the instructions carefully ensures success. If you encounter difficulties, such as alignment issues or missing parts, refer to the troubleshooting section or contact Ashley Furniture support. Patience and attention to detail are key to a smooth assembly experience. With proper preparation and adherence to the guide, you can complete the task efficiently and enjoy your new bed.