Welcome to the Dutchmen RV Control Panel Manual․ This comprehensive guide provides detailed instructions for operating, maintaining, and troubleshooting your RV’s control panel system․ Designed to enhance your RV experience, it covers installation, settings, and safety measures, ensuring optimal performance and ease of use․
Purpose and Scope of the Manual
This manual serves as a complete guide for understanding and utilizing the Dutchmen RV Control Panel․ It provides detailed instructions for installation, operation, and maintenance, ensuring users can maximize the panel’s functionality․ The scope includes troubleshooting, safety precautions, and advanced customization options․ Designed for both novice and experienced users, the manual offers clear, step-by-step guidance to ensure seamless control of your RV’s systems, enhancing your overall camping experience with efficiency and confidence․
Key Features of the Dutchmen RV Control Panel
The Dutchmen RV Control Panel offers a user-friendly interface with advanced features designed to enhance your RV experience․ It includes a touchscreen display, smart device integration, and customizable settings for optimal system control․ The panel also features real-time monitoring of essential systems, such as power, water, and temperature, ensuring efficient management of resources․ Additional highlights include programmable shortcuts, energy-saving modes, and compatibility with various appliances, making it a versatile and intuitive solution for managing your RV’s operations seamlessly․
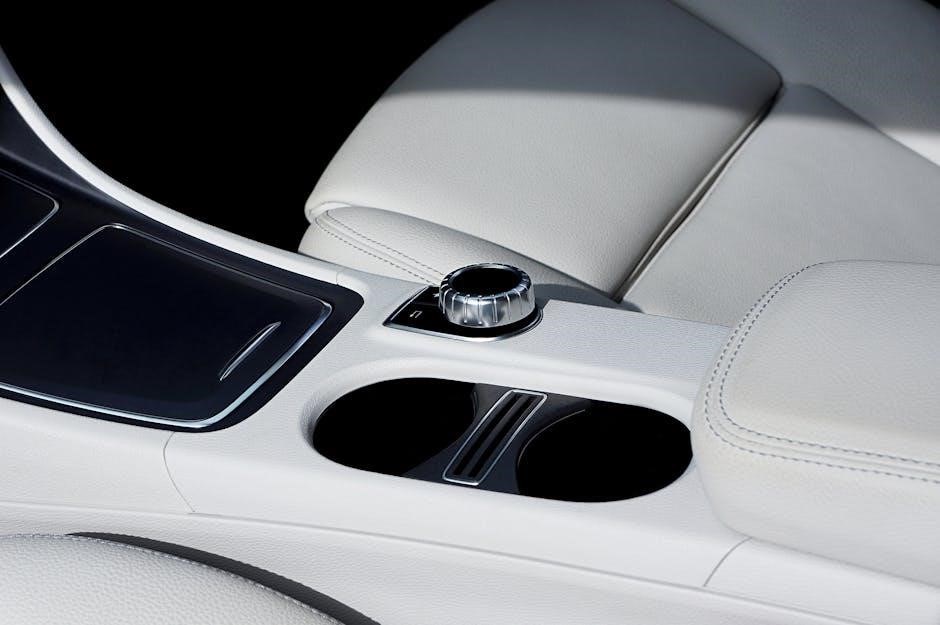
Understanding the Control Panel Layout
The Dutchmen RV Control Panel features a sleek, intuitive design with clearly labeled buttons, a touchscreen interface, and LED indicators․ Components are logically organized by system for easy access and operation․
Overview of the Panel Components
The Dutchmen RV Control Panel consists of a touchscreen display, system control switches, LED status indicators, and a 12V control interface․ Components include climate control buttons, lighting switches, and system monitors․ The panel integrates sensors for temperature, water, and battery levels, providing real-time feedback․ Additional features include programmable settings and smart device integration․ Each component is designed for intuitive operation, ensuring seamless control over your RV’s systems․ The panel’s layout prioritizes accessibility, with critical functions prominently displayed for easy access while maintaining a sleek, modern design․
Navigation and Basic Controls
The Dutchmen RV Control Panel features an intuitive touchscreen interface for easy navigation․ Basic controls include menu buttons for accessing system settings, power toggles, and function selectors․ The Vegatouch system allows seamless operation of lighting, climate, and water systems․ Navigating through menus is straightforward, with clear labels and logical grouping of functions․ Essential controls, such as system power and status monitoring, are prominently displayed․ The panel also supports gesture-based interactions for enhanced usability․ This design ensures quick access to critical functions, making it user-friendly for both novice and experienced RV owners․
Installation and Setup
Ensure compatibility with your RV’s electrical system and follow the step-by-step guide for proper installation․ Consult the manual for wiring diagrams and manufacturer guidelines to ensure a safe and correct setup․
Pre-Installation Requirements
Before installing the Dutchmen RV Control Panel, ensure your RV’s electrical system is compatible with the panel’s specifications․ Verify the power supply requirements and review the wiring diagrams provided in the manual․ Ensure all existing systems, such as lighting and appliances, are compatible with the control panel’s functionality․ Consult the manufacturer’s guidelines for any specific pre-installation checks․ Proper preparation will ensure a smooth and safe installation process, avoiding potential issues during setup․
Step-by-Step Installation Guide
Start by mounting the control panel in an accessible location, ensuring proper alignment and secure fastening․ Connect the power supply according to the wiring diagram, verifying polarity to avoid damage․ Link the panel to your RV’s systems, such as lighting and appliances, following the manufacturer’s instructions․ Sync the control panel with your mobile device if equipped with smart features․ Test all functions to ensure proper operation․ Refer to component manuals for detailed instructions on integrating specific systems․ Follow safety guidelines to complete the installation successfully․
Operating the Control Panel
The Dutchmen RV control panel simplifies system management, offering intuitive controls for lighting, appliances, and climate․ Use the touchscreen interface for seamless adjustments and real-time monitoring of your RV’s functions․
Turning On and Off the System
To power on the Dutchmen RV control panel, locate the main power switch, typically found on the panel or linked to your RV’s electrical system․ Flip the switch to the “ON” position․ The system will initialize, displaying a startup screen․ For shutdown, switch the power to “OFF” and confirm all components are inactive․ Always ensure systems are powered down before disconnecting or servicing․ Refer to the manual for specific startup/shutdown sequences to avoid system errors or electrical issues․
Adjusting Settings for Optimal Performance
To optimize your Dutchmen RV control panel, navigate to the settings menu using the touchscreen or control buttons․ Calibrate the display by following the on-screen prompts․ Adjust brightness and contrast for visibility in varying light conditions․ Customize temperature, lighting, and power management settings to suit your preferences․ Ensure all sensors are synchronized with the control panel for accurate data readings․ Regularly update settings to reflect changes in your RV’s configuration or usage patterns․ Proper adjustments ensure seamless operation and enhanced functionality of your RV systems․

Troubleshooting Common Issues
Identify and resolve issues by checking error codes, sensor connectivity, and system settings․ Reset the control panel if necessary to restore functionality and ensure proper operation․
Identifying Error Codes and Alarms
The Dutchmen RV control panel displays error codes to indicate system issues․ Common codes include E1 for low battery voltage and E2 for sensor malfunctions․ Alarms may sound if critical systems fail, such as the propane or CO detectors․ Refer to the error code chart in this manual for detailed explanations․ If an error occurs, check the panel’s display, consult the troubleshooting guide, and address the issue promptly to ensure safety and optimal system performance․ Always document the error for reference when contacting support․
Resetting the Control Panel
To reset the Dutchmen RV control panel, first power off the system and wait 30 seconds․ Press and hold the Power button for 10 seconds until the display flashes․ Release the button and allow the panel to reboot․ If issues persist, press the Reset button located at the back of the panel for 5 seconds․ Ensure all connections are secure and check for any loose wires․ After resetting, test the system to confirm proper functionality․ If problems remain, consult the troubleshooting section or contact Dutchmen RV support for assistance․

Maintenance and Upkeep
Regular cleaning and inspection of the control panel ensure optimal performance․ Updates to software and firmware are essential for functionality․ Always check connections and components for wear or damage․
Cleaning and Inspecting the Panel
Regularly clean the control panel with a soft, dry cloth to prevent dust buildup․ Avoid harsh chemicals or abrasive materials that could damage the screen․ Power off the system before cleaning․ Inspect all buttons, screens, and connections for signs of wear or damage․ Check for loose wires or corrosion, which can disrupt functionality․ Refer to the manual for specific cleaning solutions recommended by the manufacturer․ Ensuring the panel remains clean and intact is crucial for maintaining reliable performance and extending its lifespan․
Updating Software and Firmware
To ensure optimal performance, regularly update your Dutchmen RV control panel’s software and firmware․ Check the manufacturer’s website for the latest versions and follow the provided instructions․ Connect the panel to a power source and use the built-in update feature or download updates via USB․ Always back up settings before updating to prevent data loss․ After installation, restart the system and verify that all features function correctly․ Regular updates enhance functionality, security, and compatibility with integrated devices․
Advanced Features and Customization
Explore advanced features like smart device integration, custom settings, and enhanced control options․ Tailor your RV’s control panel to meet your specific needs for a personalized experience․
Programming Custom Settings
Program custom settings to tailor your RV’s control panel to your preferences․ Adjust temperature, lighting, and system operations for personalized comfort․ Use the touchscreen interface to set unique configurations and save them for future use․ Customize alarm settings, display preferences, and system responses to enhance your RV experience․ Ensure seamless integration with smart devices by syncing preferences across connected systems․ Follow the manual’s guidelines for step-by-step programming to optimize performance and efficiency․ Explore advanced customization options to make your RV truly unique and user-friendly․
Integrating Smart Devices and Sensors
Enhance your RV experience by integrating smart devices and sensors with the Dutchmen RV control panel․ Sync with the Firefly system via the Vegatouch Touchscreen or mobile app for seamless control․ Connect smart home devices, thermostats, and security systems for remote monitoring․ Use sensors to track water levels, battery status, and propane levels in real-time․ Customize notifications and automate settings for optimal efficiency․ Ensure compatibility by following the manual’s pairing instructions․ This integration offers enhanced convenience, energy management, and peace of mind while on the go․

Safety Precautions and Guidelines
Always follow manufacturer guidelines for electrical safety and system operation․ Handle components carefully to avoid damage or electrical hazards․ Keep the control panel dry to prevent malfunctions․ Regular inspections ensure optimal functionality and user safety․ Adhere to emergency shutdown procedures in case of system failures or alarms․
Electrical Safety Measures
When working with the Dutchmen RV Control Panel, ensure all electrical systems are powered off before performing maintenance or repairs․ Avoid exposing the panel to water or moisture, as this can cause malfunctions or electrical hazards․ Use properly rated wiring and connectors to prevent overheating or short circuits․ Always follow the manufacturer’s guidelines for voltage and current specifications․ Never attempt to modify the control panel without professional assistance, as this can lead to serious electrical issues․ Regularly inspect wiring and connections for damage or wear to ensure safe operation․
Emergency Shutdown Procedures
In case of an emergency, locate the main power switch near the control panel and turn it off immediately․ Disconnect the 12V power supply to halt all electrical functions․ If the system does not shut down, check for any error codes or alarms and follow the troubleshooting guide․ Ensure all lights and appliances are turned off to prevent damage․ If issues persist, consult the manual or contact Dutchmen RV support for assistance․ Always prioritize safety to avoid electrical hazards or system malfunctions․
Technical Specifications and Compatibility
This section outlines the system requirements, electrical compatibility, and wiring diagrams for the Dutchmen RV control panel, ensuring proper installation and functionality across various RV models and setups․
System Requirements and Compatibility
The Dutchmen RV control panel is designed to work with 12V electrical systems, ensuring compatibility with most Class A, B, and C motorhomes, as well as Fifth Wheels and Travel Trailers․ It supports integration with popular smart devices and sensors, enhancing functionality․ The system requires a stable power supply and operates seamlessly with updated software versions․ Compatibility with various RV models and appliances is guaranteed, provided installation guidelines are followed․ Always verify specifications before installation to ensure optimal performance and avoid potential conflicts․
Wiring Diagrams and Schematics
The wiring diagrams provided in the Dutchmen RV Control Panel Manual detail the electrical connections for the system․ These schematics outline the 12V power supply setup, sensor integration, and touchscreen connectivity․ Diagrams include wiring for the Firefly system, capacitive touchscreens, and 12V control panels․ Ensure all connections match the specified wiring harness to avoid malfunctions․ Refer to the diagrams for proper installation of switches, sensors, and power distribution units․ Always follow the manufacturer’s guidelines to maintain system integrity and safety․
Manufacturer Support and Resources
Access comprehensive support through Dutchmen RV’s official website, including downloadable manuals, troubleshooting guides, and customer service contact information․ Online forums and FAQs are also available for assistance․
Contacting Dutchmen RV Support
For assistance with your Dutchmen RV control panel, contact their dedicated support team via phone, email, or through the official website․ Support is available Monday-Friday, 8 AM-5 PM EST․ The website also offers a contact form for inquiries․ Ensure to have your RV’s serial number ready for faster service․ Their knowledgeable team is equipped to address technical questions, provide troubleshooting guidance, and direct you to nearest service centers․ Response times are typically within 24-48 hours for email inquiries․ Visit the Dutchmen RV website for detailed contact information and support resources․
Accessing Online Manuals and Guides
To access the Dutchmen RV Control Panel Manual and other related guides, visit the official Dutchmen RV website․ Navigate to the “Support” or “Resources” section, where you can find downloadable PDF versions of manuals tailored to your specific model․ Use the search function by entering your RV’s model number or year to quickly locate the correct documentation․ Additionally, some manuals are available through third-party sites like ManualsPlus․ Ensure to verify the source for authenticity and compatibility with your RV’s control panel system․
Final Tips for Effective Use
- Regularly update software to ensure all features function optimally․
- Perform routine inspections to identify and address potential issues early․
- Consult the manual before attempting complex customizations or troubleshooting․
- Test all functions before embarking on trips to avoid unexpected problems․
- Keep the control panel clean to prevent dust and dirt from affecting performance․
- Organize cables to maintain a clutter-free and safe operating environment․
- Attend workshops or online tutorials to maximize your understanding of advanced features․
By following these tips, you’ll ensure a seamless and enjoyable experience with your Dutchmen RV Control Panel․
Importance of Regular Maintenance
Regular maintenance is crucial for ensuring the longevity and optimal performance of your Dutchmen RV Control Panel․ By following the recommended schedules and procedures, you can prevent system malfunctions, reduce the risk of electrical issues, and maintain seamless functionality․ Routine inspections and updates help identify potential problems early, saving time and money․ A well-maintained control panel also enhances safety, reliability, and overall user experience, ensuring your RV remains in top condition for years to come․